
Home › Dictation › Make It Write Like You
Make It Write Like You
Abridge drafts four sections by default. Ten minutes of setup makes every future note read the way you write. Settings are per clinician and apply to every future note; nothing on this page changes a note you have already signed.
Build your Ambient speed button first; it takes about a minute.
Note settings
Left alone, Abridge drafts four sections. Your note preferences decide which sections generate, whether each one reads concise or comprehensive, bulleted or paragraph, and which physical exam template it follows. Set them once in the Abridge activity and every future note follows them.
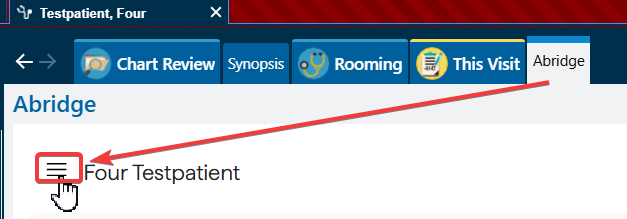
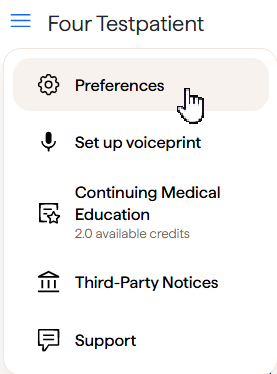
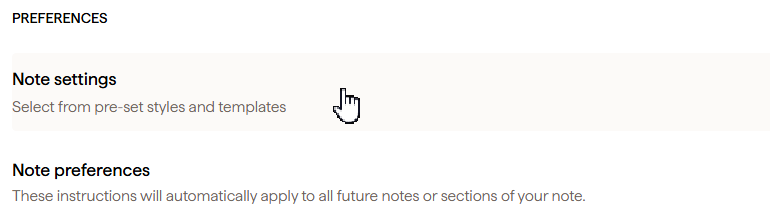
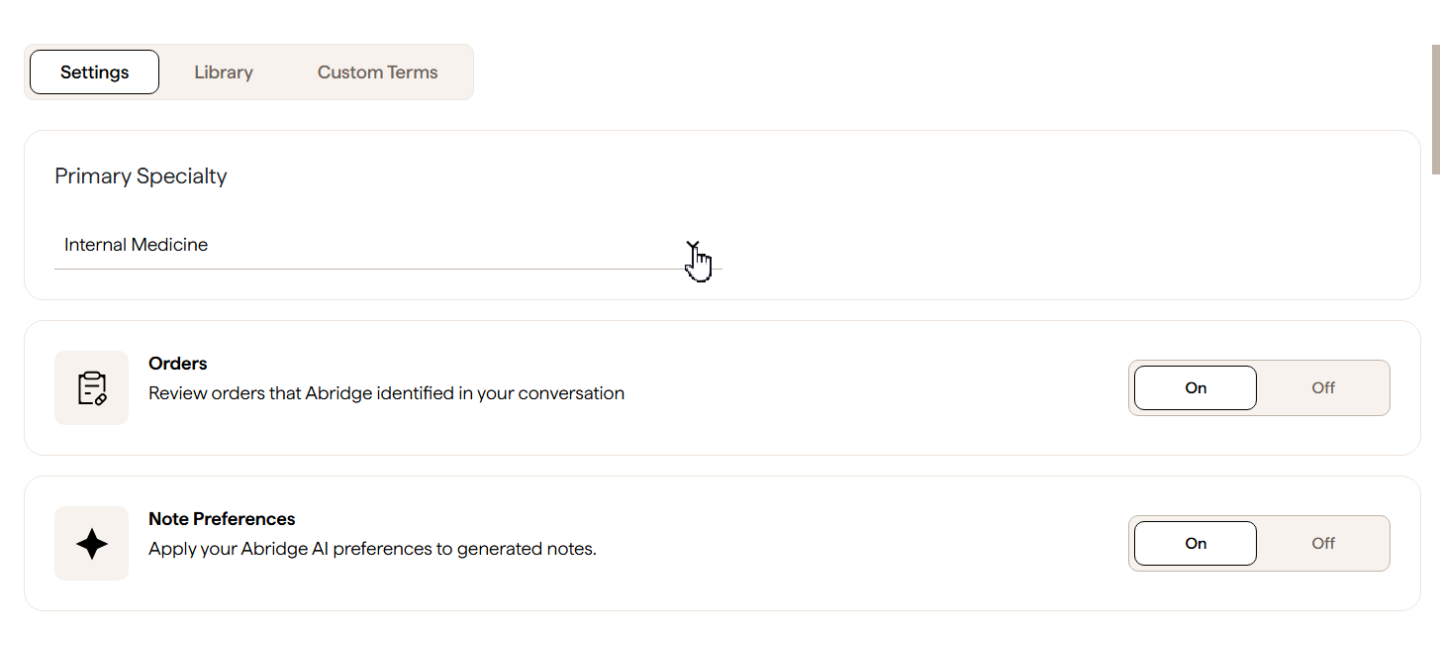
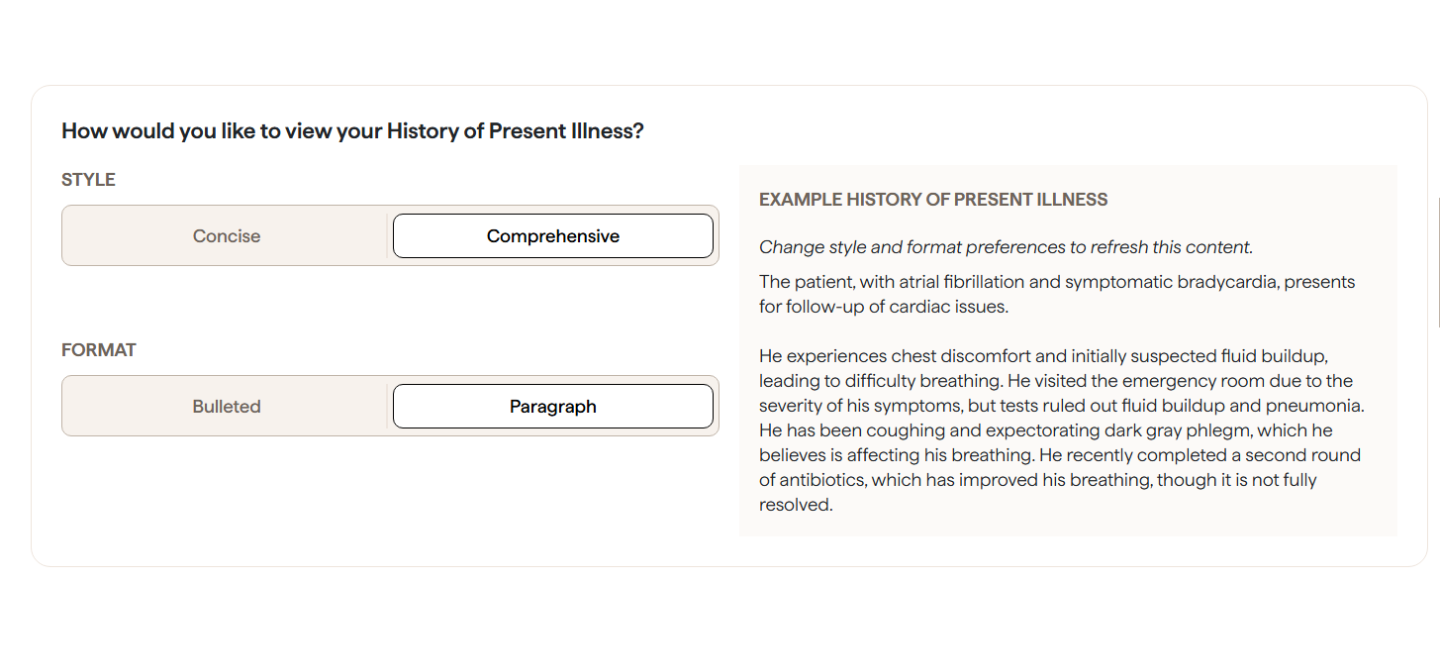
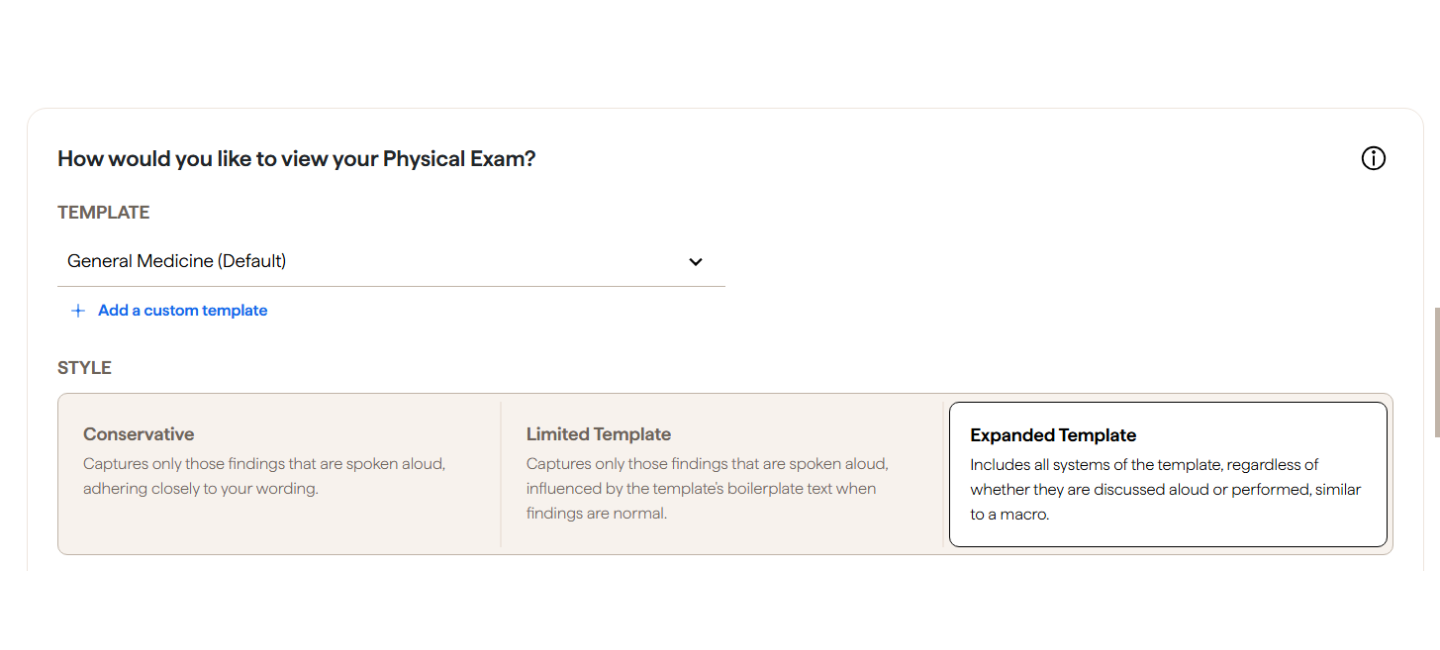
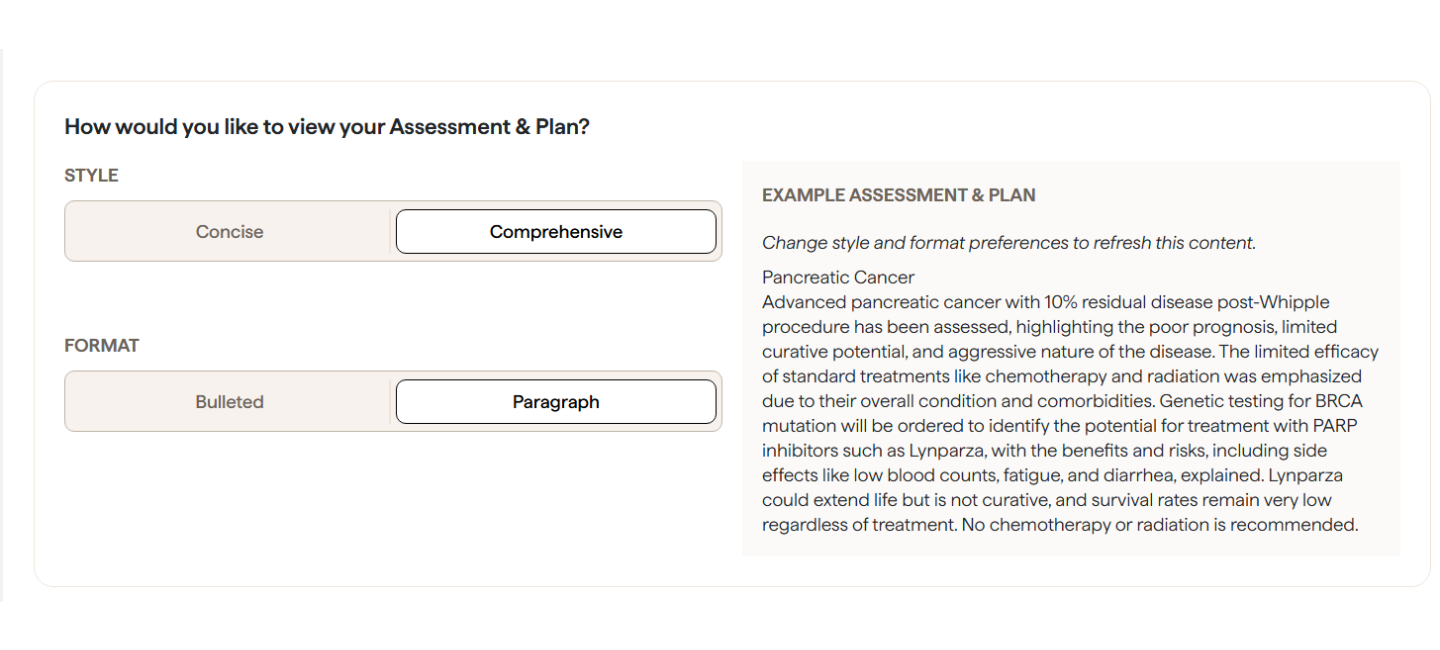
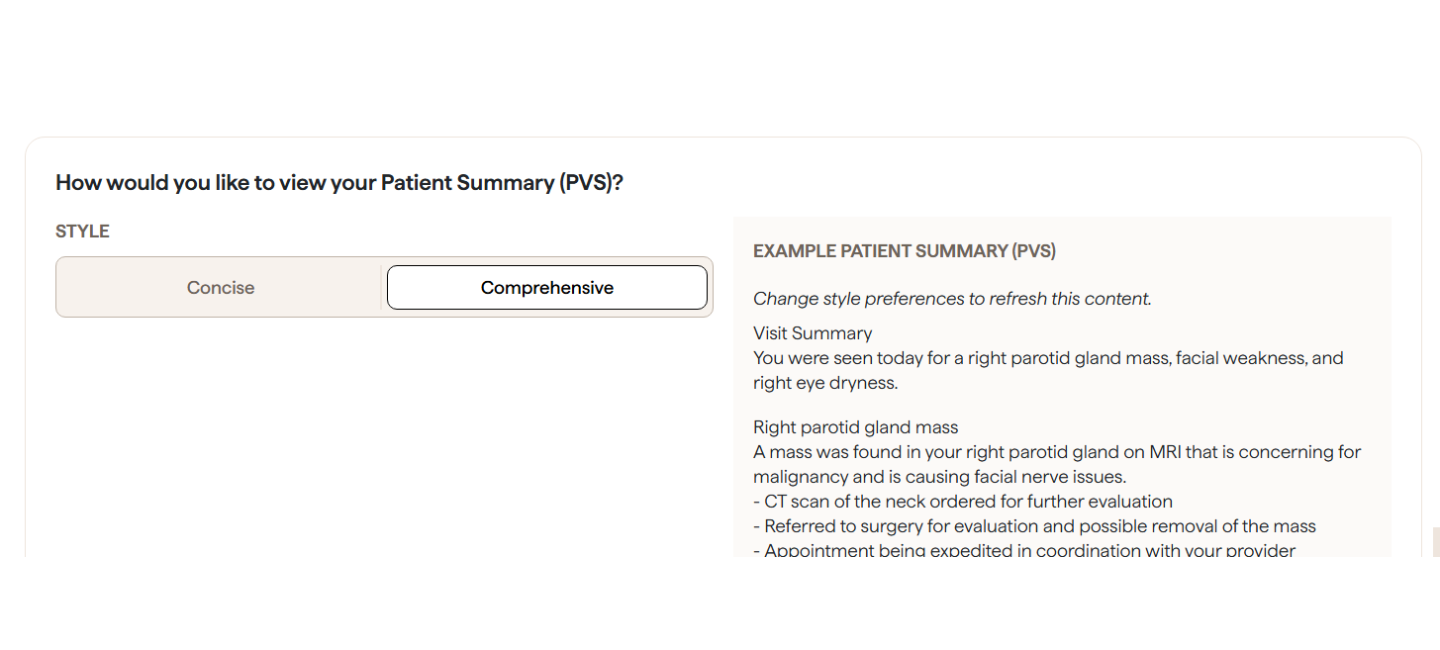
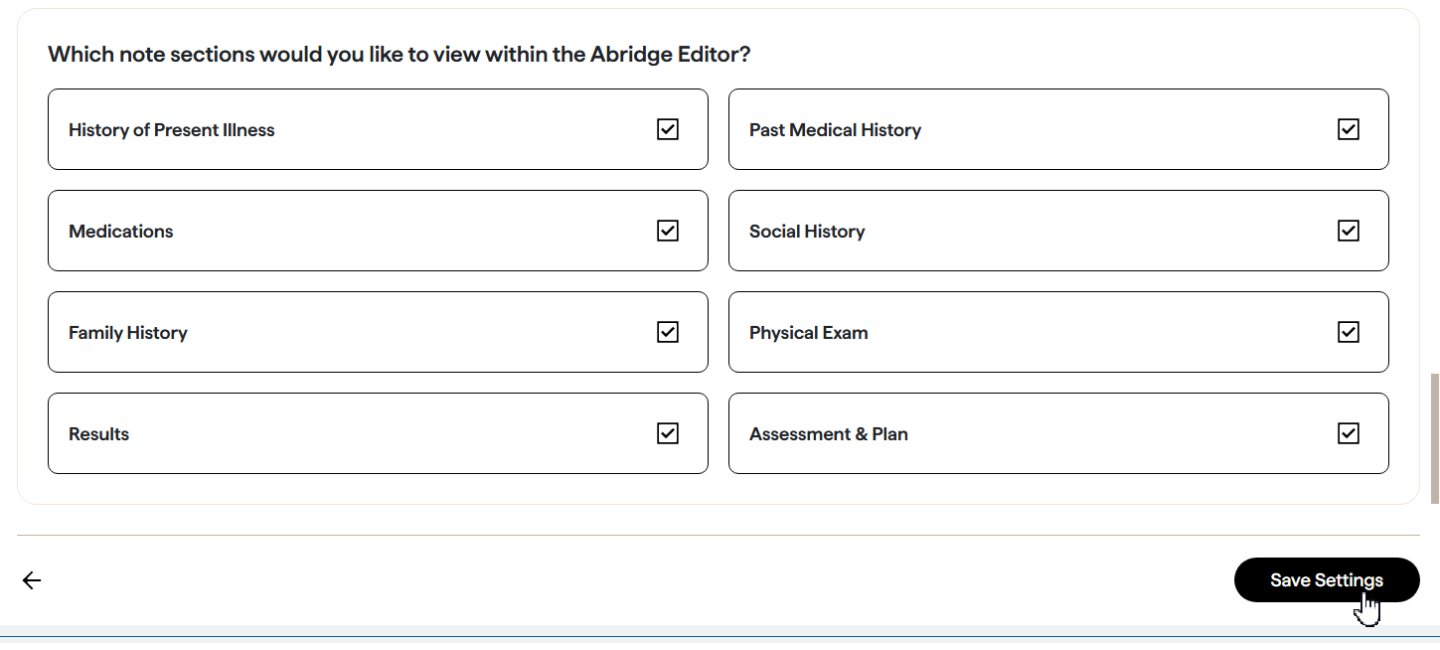
Nothing sticks until you click Save Settings at the bottom of the page. After that, every note Abridge drafts for you follows these preferences.
- Set your physical exam style to Expanded, so your standard exam template is always output with the pertinent changes incorporated.
- For H&P, admission, and consult notes, use a comprehensive HPI and a bulleted assessment and plan.
- For progress notes, use Abridge for Subjective, Physical Exam, Results, and A&P.
Note preferences in plain language
This is the one I would not skip. Back on the PREFERENCES page, Note preferences holds free text instructions that apply to all future notes. Click Edit preferences and paste the text below into the box. The ambient SmartText only pulls in History of Present Illness, Physical Exam, Results, and Assessment and Plan. This instruction appends the rest of the history you discussed, past medical, past surgical, home medications, allergies, social, and family history, to the bottom of your HPI so it comes in with the note.
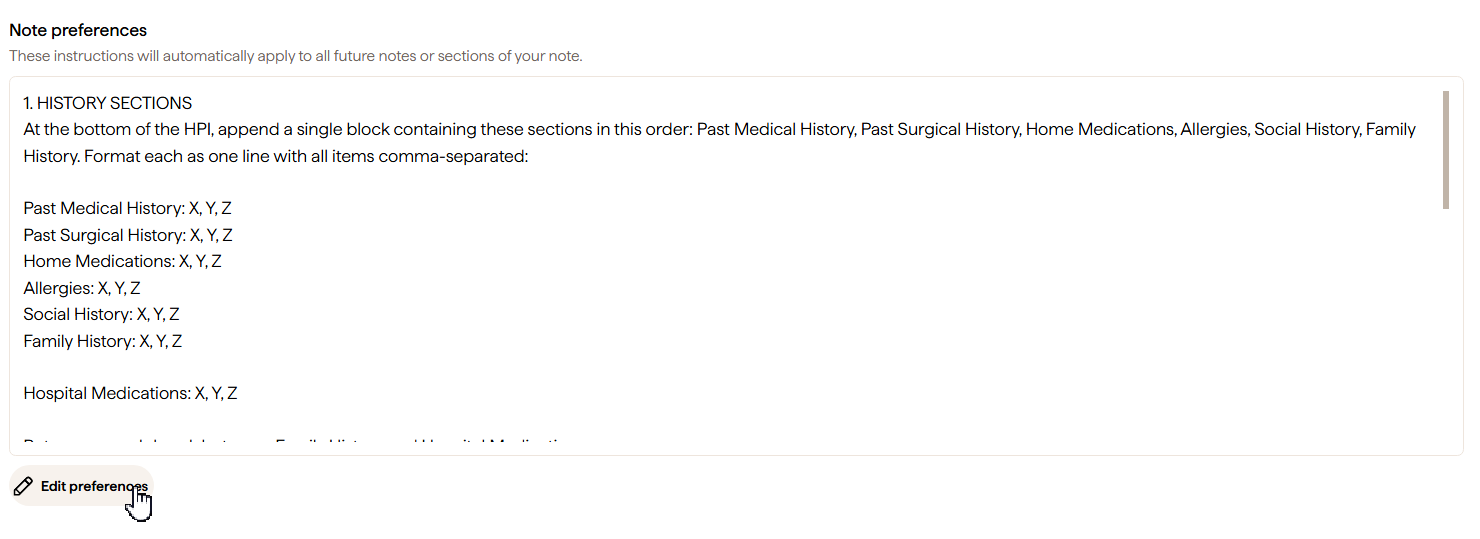
Edit it as you see fit. Anything you leave in the box applies to every future note you generate.
Save Settings at the bottom of the page, and the next note you generate follows it.
Or just say it in a sentence
You can also set a preference by typing it into Abridge AI chat as a sentence, for example "always use a bulleted medication section." Abridge saves it and applies it to every future note. Preferences can be edited or removed the same way ("remove my preference about review of systems") or on the Preferences page. The plus sign at the bottom left of the Abridge AI chat box opens Manage all preferences, where your saved prompts and note preferences live together.
To see a note without your preferences, press Redraft, toggle Note preferences off, and choose Generate all sections. Then Replace all or Dismiss all. The Note preferences master toggle is in Preferences, then Note settings.
Prompt editing after the visit
In the Abridge tab, type an instruction such as "make the note more concise" or "move follow-up items under their problems in the A&P," review the suggested edits, then accept or reject them. If you made those edits in the Abridge tab after the note was already pulled into Epic, click Send to EHR to push the updated note back. If you have not pulled the note in yet, your Ambient speed button brings in the edited version and Send to EHR is not needed.
Bookmark prompts you use often. A saved prompt can be promoted to a permanent preference with the copy icon on the Note preferences page, which turns a one time instruction into how your notes are always written.
Tip from Abridge: the edits you make by hand every day are your best prompt ideas.
Put Abridge content in your own note templates
The Abridge dot phrases are .HPISEC (History of Present Illness), .PESEC (Physical Exam), .RESULTSEC (Results), and .APSEC (Assessment and Plan). Add them to your own SmartPhrase or note template so the content lands in the right section every time.
- In Epic, open My SmartPhrases.
- Open your template, or click New.
- Put the cursor where the Abridge content belongs.
- Type the dot phrase name and press Enter to nest it.
- Click Accept.
If you are hesitant, start with .HPISEC alone. Note that the Ambient speed button already pulls the four sections in; this is for providers who want Abridge content inside a template they already use.
Use your existing physical exam template
If you already have an exam macro in Epic, you do not have to rebuild it. Copy its text, then load it into Abridge once.
- Copy the text of your exam macro out of Epic.
- In the Abridge tab, open the menu (three lines, upper left), then Note Settings, then Physical Exam Settings.
- Click Add a Custom Template, or the Library tab and the plus sign.
- Click Upload Template, paste your text, name it, and click Save Template.
- Avoid special characters such as / or + in the template.
- Structure each line as SYSTEM HEADER: Finding 1, Finding 2.
- Select it as your default, and set the style to Expanded.
Expanded means your whole template is output on every note, with what you said during the exam incorporated.
Saved templates can be reviewed and edited any time from the Library tab at the top of the Settings page.
More on Abridge
Verify the diagnoses Abridge heard and sign your orders. Clinic visits only.
Verify and sign →Trackboard, note types, pulling a prior note forward, and habits by setting.
See your setting →